
There are multiple ways to transfer roster data from PowerSchool to SchoolStatus Connect. They include:
- Daily sync through a 3rd-party service like Clever and ClassLink
- Daily sync from the CSV files shared via SFTP (with or without SchoolStatus Connect’s PowerSchool plug-in)
- Manual uploads of the CSV files directly on SchoolStatus Connect
This article covers the second option - daily sync with CSV files and SFTP.
For roster synchronization, SchoolStatus Connect can only operate with OneRoster-formatted CSV files.
It is up to you to prepare valid files and send them to SchoolStatus Connect’s SFTP server.
The plug-in can help you to create the data export templates that you can then use when setting up PowerSchool AutoSend via SFTP.
Once the files are successfully shared with SchoolStatus Connect, we will ask you to finalize the sync setup following the instructions here - at this stage, you've already completed steps 1 and 2. After the sync is complete, if you're happy with your data, you may leave the sync enabled and it will run automatically once a day. Please note that you can customize the synchronization start time on the SIS Rostering page to make sure the data is synced with SchoolStatus Connect right after you send the updates via SFTP.
Each synchronization generates a sync report for each file. The reports are available in school or district settings depending on how the sync is set up.
Users do not receive any notifications as a result of the initial sync.
PowerSchool Plug-in
The easiest way to prepare valid OneRoster files would be to use SchoolStatus Connect’s plug-in for PowerSchool. The plug-in allows you to easily create data export templates that you can use when setting up PowerSchool AutoSend via SFTP. Please note that the plug-in may not work for your particular data configuration in PowerSchool. If that's the case, you may still use other available tools to prepare the OneRoster files.
You will need to send three CSV files to SchoolStatus Connect. They are:
- users.csv
- classes.csv
- enrollments.csv
To download the ZIP file with the plug-in, please click here.
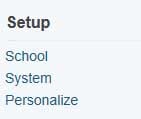
To Install the plugin file or package, login to the admin side of PowerSchool. On the left hand side, under Setup, select System:
On the System page, scroll down to the Server section, and select System Settings:

On the System Settings page, select Plugin Management Configuration:

On the Plugin Management Dashboard, select Install on the top right of the page.

From the Plugin Install page, select Browse and select your plugin.xml file or your compressed (.zip) plugin package.
❗ Important note: Please make sure you install the plug-in using the original ZIP file. No need to unzip it or extract the plugin.xml file before the installation.
Please follow the instructions below to create data export templates.
users.csv
Log into your PowerSchool.
Click on Setup>System.
Then click on “Page and Data Management” in “Data Management”
Then click “Export Data” in “Data Export”
Open the “Category” dropdown and select “Additional Data Sets”
In the “Export From” field, select NQ - com.classtag.one_roster_users (NQ stands for Named Queries)
Please select USERS records and adjust labels used on export.
Key things:
- Make sure to remove the
USERS.from every label - Make sure the
languagelabel is singular - Depending on how you manage contact phone numbers, you may want to use the
smslabel for theUSERS.phonefield, and thephonelabel for theUSERS.smsfield -
Dcidfield is not taking part in the sync, so it may be excluded from the list
Please see the screenshots below for how it needs to be set up.
Review the data. If it is what you want to share with SchoolStatus Connect, please click Next.
Update the export summary:
- File name should be users.csv
- Line delimiter - CR
- Field delimiter - Comma
- Character set - UTF-8
- Include comma headers - enabled
- Surround field values in quotes - disabled
Click “Save Template”.
Provide a name, e.g. connect_users.
Save as new
When the users.csv template is ready, please prepare the classes.csv and enrollments.csv templates.
classes.csv
For the classes.csv file, please select NQ - com.classtag.one_roster_classes in additional data sets.
Select all fields in SECTIONS.
Remove SECTIONS. from every label.
Please see the example below.
Click Next to preview the data.
If the data looks good, please click Next to update the export summary:
- File name should be classes.csv
- Line delimiter - CR
- Field delimiter - Comma
- Character set - UTF-8
- Include comma headers - enabled
- Surround field values in quotes - disabled
Click “Save Template”.
Provide template name - e.g. connect_classes.
Save as new template.
enrollments.csv
For the enrollments.csv file, please select NQ - com.classtag.one_roster_enrollments in additional data sets.
Select all fields.
Remove CC. from every label.
Please see the example below.
Click Next to preview the data.
If the data looks good, please click Next to update the export summary:
- File name should be enrollments.csv
- Line delimiter - CR
- Field delimiter - Comma
- Character set - UTF-8
- Include comma headers - enabled
- Surround field values in quotes - disabled
Click “Save Template”.
Provide template name - e.g. connect_enrollments.
Save as a new template.
Next, we are going to setup the remote connection between SchoolStatus Connect and your PowerSchool Instance.
Go to System Administrator > System Settings > Plugin Management Dashboard > Manage Remote Connections
Under Create Connection, name it "SchoolStatus Connect" and enter the other details below:
Name: SchoolStatus Connect
Host: fileupload-ct-sftp.schoolstatus.com
Port: 2222
Authentication Type: Password
Enter the username and password that was shared with you previously (SFTP <District/School Name>.csv)
Do a test connection, and after it fails, please select 'Yes, Accept Host Key'
It will test the remote connection
and confirm that the connection is a success. Enable 'Allow upload' and click on Submit at the bottom to confirm the setup.
After configuring the remote connection, we are now ready to set a schedule for exporting the files from the saved templates.
Go to System Administrator > Page and Data Management > Export Templates
- click on the Schedule button right under Actions column:
- mark it active, and set the days to execute and time
- set 'Send Output To' to: SchoolStatus Connect (name of the Remote Connection that was completed earlier
- *Optional: enter your email under 'Email Completion Report To'
After the steps above are complete, you will need to follow the OneRoster SFTP sync setup guide to finalize the automated synchronization setup.
Processing Student Contacts
SchoolStatus Connect's plug-in exports guardian information from the PowerSchool's Contacts page.
All files produced with the help of the plug-in follow OneRoster v1.1 specification. OneRoster v1.1 only supports three roles for student contacts. They are:
guardian-
parent -
relative
Since PowerSchool supports much more relationships and tags than that, the plug-in modifies the Student Information System (SIS) data so that it matches OneRoster v1.1. The following rules are applied to transform PowerSchool Contacts into OneRoster Users:
- If a Contact's relationship is
motherorfather, it is transformed intoparentrole for the User. - If a Contact has the
legal guardianflag set totrue, his role is transformed intoguardianrole for the User.
When processing the users.csv file, SchoolStatus Connect only adds Users with roles parent, guardian and relative as student guardians. But since the plug-in doesn't currently set the role to relative for any PowerSchool Contacts, it means that Contacts with relationships like uncle, grandmother, sister and others will not be added as guardians on SchoolStatus Connect unless they are legal guardian in PowerSchool.
It is also worth mentioning that the legal guardian flag is usually enabled in PowerSchool for some US states, but not all of them. If this field is not enabled in your PowerSchool, then the plug-in will only rely on contact relationships with students.
If the specified rules do not really work for your PowerSchool or you have additional questions, please let us know at connectsupport@schoolstatus.com.
Click here to return to the main menu- or ask for help!